Saturday, June 27, 2009

CSA Week #5

I am going to miss spinach :).  I used last week's portion to make some tasty spinach pies.  I also made my parents some awesome mullberry muffins last weekend.  I am glad to see some new additions to this week's basket:

Sugar Snap Peas
Squash
Strawberries
Baby Lettuce
Baby Chard
Flax & Roses
Leeks
Thyme
Nasturtium Leaves
Broccoli (in the full share baskets - we didn't get any)

I can't wait to get started on the chard... I'm thinking it will end up being in a sweet/sour pickle.  Also, Marion was kind enough to give me a 'free sample' of one of their chickens.  We'll be eating that tomorrow, and if its as good as I think it will be, I'm sure we'll be ordering several to stock our freezer up!

June Daring Bakers - Bakewell Tarts


The June Daring Bakers' challenge was hosted by Jasmine of Confessions of a Cardamom Addict and Annemarie of Ambrosia and Nectar. They chose a Traditional (UK) Bakewell Tart... er... pudding that was inspired by a rich baking history dating back to the 1800's in England.

I don't do tarts very often, mostly because its been easier to accomplish the same thing as pies, bars, etc.  This month's challenge was surprisingly easy and very versatile.  Regardless of the 'controversy' related to what these actually are and where they came from, mine couldn't be mistaken for anything but a tart.

We had the freedom to choose fillings and size, so long as we used the sweet shortcrust pastry and frangipane.

Shortcrust Pastry

225g all purpose flour 
30g sugar
1/2 tsp salt
one stick cold unsalted butter
2 egg yolks
1/2 stp almond extract
1-2 Tbsp cold water

Sift together flour, sugar, and salt.  I processed the butter and flour mixture in the food processor and set aside.  Lightly beat egg yolks, and almond extract and add to dough, processing will adding.  Keep mixing while adding water a little at a time just until the dough starts to come together.

Frangipane

125g unsalted butter, softened
125g icing  sugar
3 eggs
1/2 tsp almond extract
125g ground almonds
30g all purpose flour

Cream butter and sugar together until the mixture is fluffy.  Scrape down bowl and add eggs one at a time, beating well after each addition.  The batter may appear to curdle, this is okay. After the three eggs are added, pour in the extract, then add nuts and flour.  Mix well.  I loved how yellow the farm raised eggs made the filling :).

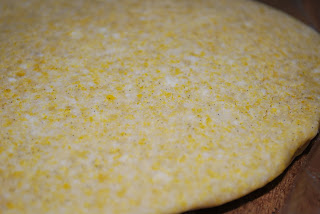
To assemble, roll chilled dough disc out on a lightly floured surface, rolling in one direction and turning a quarter until the disc is about a quarter of an inch in thickness.  Place dough in pan, and freeze for at least 15 minutes before using.  Pull out of freezer and spread jam filling.  Then add the frangipane and bake in a 400 degree oven for 30 minutes.  At 5 minutes left, pull out the tarts and sprinkle slivered almonds on top of each tart.


I made apricot jam and cherry jam for fillings, however the cherry filling ended up in a mediterranean cherry pie for last night's dessert to use up some dough I had left over from making spinach pies and meat pies earlier in the day.  So I used up some store bought raspberry jam and also made some nutella ones.


They turned out pretty good.  I was initially disappointed that the shortcrust wasn't sweet enough, but it balanced well with the sweet jam and the frangipane  filling.  The hubs loved the apricot the best.  He' not a big fan of apricots normally, but said it was the best flavor combination of the three.

Saturday, June 20, 2009

CSA Week #4

This week's CSA share included:

Spinach
Baby Lettuce (Romaine)
Baby Kale
Baby Leeks
Garlic Scapes (the last of this season's)
Mulberries
Chamomile


This week I have enough spinach to make a few spinach pies, and I hung the chamomile to dry so I can use it in tea and cookies later in the year.

Wednesday, June 17, 2009

Greek sauce from childhood and more...

We try to eat healthy, yet from time to time, usually related to daring bakers, we splurge on the not-so healthy. Earlier this week, I'd been thinking about what to do with some ground chuck I thawed out the other day and got an idea from childhood - Hot dogs with Greek Sauce.

Now I'm not so enterprising that I would make my own hot dogs... I took help from the supermarket there :). What I did make, was the Greek Sauce. Growing up in northwestern PA, Greek Sauce was one of those things that was part of life. I remember going to the hotdog shop somewhere on the west side of Erie with my grandparents, sitting in the booth, and marvelling at the tabletop juke box that was at the end of the booth. Greek sauce isn't one of those things that is easily found. It's not the same as coney sauce, and doesn't have beans in it like a chili sauce.

I decided to make this, since the hubs is a big fan of hotdogs and likes meat sauces on them, if he could he'd eat at Skyline, or our local drive up joint - The Corral, everyday. I followed the general recipe that my mom uses for greek sauce:

1 lb ground beef
1 small onion, diced
1 tsp cayenne pepper
3 tsp chili powder
1 tsp cumin
1 tsp oregano (greek oregano - if you have it in your garden!)
S & P to taste
1 1/2 cups water


Brown the beef, breaking up as fine as possible during cooking. When most of the water has cooked of, push the meat aside, tilt the pan and sop up the grease as much as possible with a paper towel. Add the onion and cook with the beef until transparent, then add the remaining spices and water. Simmer until the sauce thickens - serve on top of a hotdog, preferrably garnished with mustard and topped with chopped onion!

I was also prepping the scapes to make some pesto. I used the recipe provided by Marion in last week's CSA newsletter (adjusted for my quantities, but easily scales):

4 oz garlic scapes chopped
1/4 cup EVOO
1/2 cup grated parmesan
1/4 tsp lemon juice
1/4 cup pine nuts


Her recipe didn't call for pine nuts, but I had them on hand, and usually put them in basil pesto, so figured it couldn't hurt! Process the scapes to a fine grind with a food processor, then add the cheese and nuts. Continue processing until a coarse paste forms, then slowly add the EVOO until just combined. I mixed in the lemon juice after i pulled it out of the processor bowl then placed in an air tight container and refrigerated.


Used a few tablespoons the next night tossing it in with hot pasta and grilled chicken. It was very delicious!

Monday, June 15, 2009

Daring Cooks June 2009 - Chinese Dumplings

I missed posting for the inaugural Daring Cooks Challenge last month.  I made the gnocchi, but failed to post about it - yes, I am a slacker.

This month's WONDERFUL challenge was brought to us by the Jen of Use Real Butter.  She chose Chinese dumplings for our second ever challenge.  The only requirement was the dumplings needed to be made by hand, we had the freedom of choosing our filling, choosing our dough, and choosing our cooking process.

Chinese dumplings are so versatile.  I love these buggers and would prefer eating a whole plate of them as my dinner when we go out for chinese with friends, except that I'd feel like a weirdo doing so and resist the urge.

I followed Jen's standard dumpling recipe:

2 cups all purpose flour
1/2 cup warm water

I made the dough by hand, first by mixing the ingredients in a bowl, then transferring to the counter to knead the dough about 20 turns, then allowing to rest for at least 15 minutes before portioning out.  It actually rested a little longer as I made the fillings.

When I saw what the challenge was in the middle of May, I knew I'd probably go crazy with the fillings.  I chose to make a pork filling, a shrimp filling, and a sweet bean filling.  

The pork filling:
1 pound ground pork
5 reconstituted shitake mushrooms, diced
1/2 pound napa cabbage, finely chopped
1 tsp ginger root, diced
2 tbsp chives, finely chopped
2 tbsp soy sauce
2 tbsp sesame oil
1 tsp MSG (can leave out if so desired)

The shrimp filling:
1 pound of shrimp
1/2 cup bamboo shoots, drained and diced
3 reconstituted shitake mushrooms, diced
2 tbsp chives, finely chopped
2 tbsp soy sauce
1 tbsp fish sauce, such as patis
1 tbsp sesame oil
1 tsp red pepper powder
1 tsp MSG


The red bean filling:
1/3 cup sweet red bean paste
1/3 cup sweet mung bean paste

Dumpling dipping sauce:
6 tbsp soy sauce
2 tbsp fresh ginger, grated
3 tbsp rice vinegar (white vinegar can be substituted)
1 tsp red pepper flake (or a few dashes of red pepper powder)
1/3 tsp sugar

To make the dumplings, the dough was evenly divided and rolled into ropes approx. 3/4" in diameter then cut into 1-1.5  inch pieces.  The pieces were rolled into a ball and set aside.  I pressed each ball into a disk with my cleaver, then rolled each disk out to a very thin circle.  Picking it up and placing it into my left hand, I added a heaping teaspoon of filling to the rolled dough, folded the dough together over the middle, then proceeded to pleat the dumpling on either side of the center.


Making the dough was a snap, and even with the added forming/rolling of the dough, it didn't take all that much longer than using wonton skins, as I have previously done (since to make the moon shaped dumplings I'd cut the square skins into circles with a biscuit cutter).  


The longest part of the whole dumpling process was waiting for the buggers to cook.  I chose to fry and steam both kinds of meat dumplings and I steamed the sweet bean ones.  One other adjustment I made for the sweet ones was not rolling the dough as thin,  I wanted to make sure that the bean filling didn't overwhelm the dumpling.


We had dumplings for 2 consecutive dinners and I had them for one lunch as well.  The sweet bean dumplings were rolled in a mix of dried sweet coconut flakes, crushed roasted sesame seeds, and granulated sugar after they came out of the bamboo steamer.  I only made 4 and they didn't make it to see the camera's lens :).

CSA Week #3

I was hoping to post a little more about what I was making with the bounty from last week's CSA, but the week got out of my control thanks to the LSATs last monday, LOL.  We had numerous salads, both as sides and entrees, as well as delicious sauteed greens with the salmon I grilled up (more on that later).  I also used the scapes and some green onion tops to make garlic butter to use for grilling fish and poultry.

This weeks basket had the season's first spinach!  Here's what else was in our baskets:

Spinach
Baby Lettuce
Green Onions
Garlic Scapes
Homemade Amish Noodles
Rue
Peonies


There was a wonderful recipe included in this week's CSA newsletter for garlic scape pesto.  I am going to give that a try this week! 

Tuesday, June 9, 2009

Grilled Alaskan Halibut

Halibut is 'in season', and it's 'on sale' right now at the grocery store.  Last Saturday, I bought a 1 lb fillet and grilled it up for dinner.

The thing I love about Halibut is you can do just about anything with it.  The flesh holds up well to all kinds of seasoning combinations and cooking styles.  Back in AK, we'd do just about anything to fresh fillets from making cerviche, or smoking them, to battering them up and frying them.  The term fresh in AK = 'right off the boat' fresh.

Living in OH now, I've had to adjust my perception of 'fresh', instead of being right off the boat (or your hook!), it's more likely what you'll get here is within 36 hours of catch at the earliest, 48 hours on average, if your grocery store knows how to manage their fresh fish ordering.   The only thing I won't make with the halibut that is shipped here fresh is cerviche, that is unless its 'sushi-grade'.  I am too paranoid about making cerviche from fish I don't know the handling history of heh.  

I seasoned the fillet with EVOO, McCormick's low sodium Montreal Steak seasoning (good on just about any meat/fish), and fresh orange zest.  I usually add fresh lemon zest too, but had no lemons on hand.  I will season the halibut about an hour before grilling, to let the spices and zest infuse to the oil.


I turn the grill to high to heat up and before putting the halibut on, turn it down to medium low.  Since I am a complete grilling moron when it comes to fish, I cheat and grill the halibut (as well as other fish fillets that are skinless) on a piece of parchment.  I tried planking... too much money for something that doesn't, to me anyways, add any notable flavor and accomplishes the same thing a 5 cent piece of parchment does - a non stick barrier.

I allow the halibut to cook until the center of the fillet is just starting to go from translucent to opaque, I add a half tablespoon slice of butter to the top, close the lid and cook for 2-3 more minutes or until the butter is melted and starts browning around the edge of the fillet. Thicker fillets may require additional time, I will press the thickest part of the fillet and if it isn't firm (has a little resistance when you gently press it), allow it to stay on another minute before I check again.

Served the halibut with a baby lettuce and herb chopped salad, dressed with a sweet orange vinagrette I made from cider vinegar, honey, orange zest, fresh squeezed OJ, and light olive oil.


The seasoning combination I used on this halibut works well with any seafood/fish and chicken.    The fish (and the salad, surprisingly, as he isn't a fan of dressings that aren't italian) were gobbled right up by the hubs.  I hint that he'd easily be able to cook this, but all I get is an eye roll.  Ah well...

Friday, June 5, 2009

CSA week #2

Last week we had a supply of fresh greens, eggs and veggies.  We made several salads, a few frittatas, and a tasty pie!  This week's basket consisted of:

Baby Lettuce
Escarole/Endive Mix
Homemade Honey Oatmeal Bread
Radishes
Garlic Scapes
Green Onions
Peppermint


Looks like we still have a healthy supply of greens for salads, which we've been favoring for dinner since they are easy to make and refreshing on warm evenings.  I plan on grilling the fresh Alaskan halibut fillets I bought today to top tonight's salad!  I season the halibut with fresh orange and lemon zest, garlic, black pepper, and EVOO, then "grill" it on parchment to ensure the fish doesn't stick to the grill (I totally suck at grilling fish straight on the grates heh).  The parchment works as a thin non-stick barrier so the fish doesn't stick to the grates, making it impossible to flip.  

Strawberry Rhubarb Pie

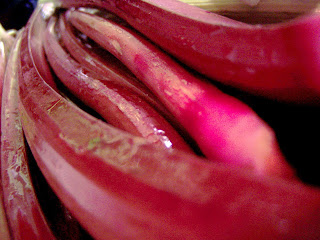
Last year this time I could only dream about rhubarb.  Spring had finally taken control of the weather in DH, but rhubarb was one of those things that never seemed to make it up to the grocery store.  This year I've been lucky to have a over abundance of the stuff thanks to the plants in my back yard and as part of Week #1 of my CSA share.

This likely being the last rhubarb I'll get this season, I decided to make the hub's favorite, strawberry rhubarb pie!  Because I was busy with another project you'll hear about later in the month, I just threw stuff together, not even following any recipe.  I used pie crust I had frozen earlier in the year that I made from Zoe's recipe (truly, TRULY fantastic recipe!), mixed in cubed  strawberries and chopped rhubarb (in approximately equal amounts, about a cup of white sugar, a quarter cup of brown sugar, a few tablespoons of flour, a few dashes of cinnamon, and a few shakes of tapioca out of its box.

Last rhubarb of the season, provided by the Shepherd's Fold Farm's Week #1 CSA share.

Choppin' strawberries... doesn't the pile of tops look like a cute bouquet of posies?

What you don't see is the hub's impatiently waiting in the background to eat this....

I made it tarter than normal, as the plan with this pie is to eat it warm with ice cream.... However it seems that something resides in our freezer that lives off of it because the vanilla bean Edy's I bought earlier in the week was no where to be found....  seems this monster likes root beer too, because a bottle of it showed up in my fridge some how!